
Rubik's Cube Succulent Planter
Rubik's Cube Succulent Planter from a 4x4.
Materials:
- 4x4 cut into a cube
- Table Saw
- Minwax Polycyrlic
- Spray Laquer
- Acrylic Paint

I cut down a 4x4 so it measured it's nominal dimensions 3.5x3.5x3.5 cube and marked the center of one side

.
I drilled out a large hole using a 2 inch forstner bit. The hole is a little more than half way down the cube. It took about 5 minutes to drill but the drilling creates a little sawdust whirlpool that makes it fun while you drill.
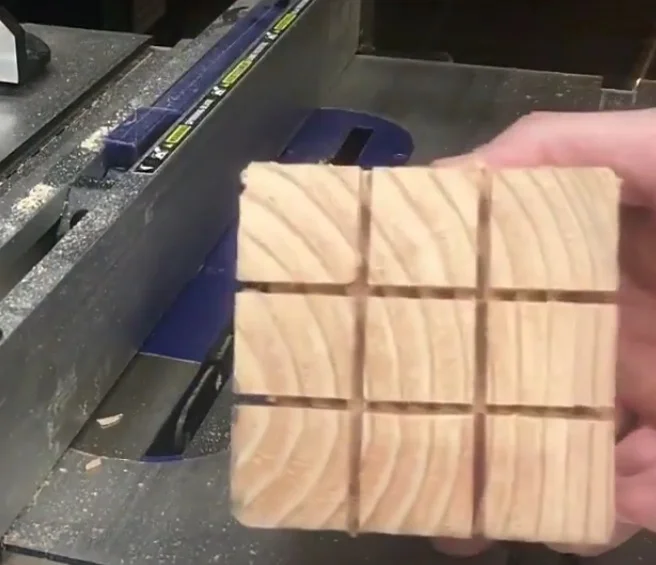

For cutting the block pattern, my table saw blade was set about 1/4 of an inch and I ran it through until each side had the cut pattern shown on the left.

I marked out the color of each block using an actual Rubik's cube then painted each square accordingly using acrylic paint.
For finishing I used 3 coats of Minwax Polycrylic to give the inside a slight resistance to water and moisture. The outside was then coated with spray laquer.

