
Ultimate Guide to Custom Woodworking Projects
Woodworking is more than a craft—it's a way to create unique, personalized pieces that reflect your style and story. Whether you're a beginner looking to build your first project or an experienced woodworker aiming to craft one-of-a-kind furniture, custom woodworking projects offer endless possibilities. This guide will walk you through everything you need to know to create stunning, personalized woodworking projects, from choosing the right materials to mastering techniques and selecting the best tools. Let’s dive into the art of custom woodworking and inspire your next masterpiece!

Why Custom Woodworking Matters
Custom woodworking is about more than building furniture—it’s about crafting pieces that tell a story. When you create a custom project, you’re designing something that perfectly fits your space, matches your aesthetic, and reflects your personality. Unlike store-bought furniture, which often lacks character, a custom piece allows you to tailor every detail, from the wood grain to the final finish. Imagine a coffee table designed to fit your cozy living room corner or a jewelry box engraved with a loved one’s initials. These projects not only serve a practical purpose but also become cherished keepsakes that carry sentimental value. Custom woodworking also lets you experiment with creative techniques, like carving intricate patterns or incorporating inlays, to make your work truly distinctive. By focusing on personalization, you can create furniture and decor that stand out in a world of mass-produced goods. This guide will walk you through the process, helping you turn your ideas into reality.
Personalize Designs: Add engravings, inlays, or unique shapes to make your piece truly yours.
Maximize Space: Craft furniture tailored to your home’s dimensions, like a custom shelf for a small nook.
Showcase Creativity: Experiment with wood types, finishes, and techniques to create standout pieces.
Build Lasting Value: Handcrafted items often become cherished heirlooms with sentimental value.
Selecting the Right Wood for Your Custom Projects
The wood you choose is the foundation of any custom woodworking project, shaping both its appearance and longevity. Different woods offer unique characteristics, so selecting the right one depends on your project’s purpose, budget, and desired look. For instance, walnut is prized for its rich, dark grain and durability, making it an excellent choice for elegant pieces like a custom coffee table or a dining table. Its deep tones lend a modern, sophisticated vibe, though it comes with a higher price tag. Cherry, with its warm, reddish hue that deepens over time, is ideal for decorative items like a personalized jewelry box, adding a touch of timeless elegance. Oak, known for its strength and prominent grain, works well for rustic projects like floating shelves or sturdy desks, offering a balance of affordability and durability. Maple, with its light color and smooth texture, is perfect for minimalist designs, such as sleek cutting boards or modern furniture. For beginners or those on a budget, pine is a versatile, affordable option that’s easy to work with, making it great for starter projects like simple shelves or frames.
When choosing wood, consider factors like hardness, grain pattern, and workability. Hardwoods like walnut and oak are durable for furniture that needs to withstand daily use, while softer woods like pine are easier to carve for intricate designs. The grain and color of the wood should align with your aesthetic goals—walnut’s dark elegance suits contemporary spaces, while oak’s rugged grain enhances rustic charm. Cost is another key consideration; pine is budget-friendly for practice projects, while walnut is a premium choice for statement pieces. Workability matters too, especially for beginners—pine is forgiving, while hardwoods require sharper tools and more skill. For a deeper exploration of wood selection, our guide on how to choose wood for custom furniture projects offers detailed insights to help you make informed decisions.
Popular Wood Types for Custom Furniture
Walnut: Known for its rich, dark grain, walnut is ideal for elegant, modern furniture like custom coffee tables or dining tables. It’s durable but can be pricey.
Cherry: With a warm, reddish hue that deepens over time, cherry is perfect for jewelry boxes or decorative pieces.
Oak: A sturdy, affordable option with a prominent grain, great for rustic floating shelves or desks.
Maple: Light-colored and smooth, maple suits minimalist designs or projects requiring a clean finish, like cutting boards.
Pine: Budget-friendly and easy to work with, pine is a go-to for beginner woodworking projects.
Factors to Consider
Hardness: Hardwoods like walnut or oak are durable for furniture, while softwoods like pine are easier to carve for decorative pieces.
Grain and Color: Choose a wood that matches your desired aesthetic. For example, walnut’s dark tones suit modern designs, while oak’s grain adds rustic charm.
Cost: Balance quality and budget. Pine is cost-effective for beginners, while walnut is a premium choice for statement pieces.
Workability: Softer woods like pine are easier for beginners, while hardwoods require more skill and sharper tools.
Designing a Custom Woodworking Project
Creating a custom woodworking project begins with a clear vision and thoughtful planning. Start by defining the purpose of your piece. Are you building a coffee table to anchor your living room, a jewelry box as a heartfelt gift, or floating shelves to maximize a small space? Next, consider the style that complements your home—modern, rustic, minimalist, or eclectic. Sketching your ideas or using design software like SketchUp can help you visualize the final product. Precise measurements are crucial to ensure your piece fits its intended space, whether it’s a custom shelf for a narrow wall or a table for a specific dining area. For inspiration, our guide on building custom floating shelves provides practical tips for tailoring designs to unique spaces.
Personalization is what sets custom woodworking apart. You can add engravings, such as initials or meaningful dates, to make a piece like a jewelry box truly special. Inlays, where contrasting wood or metal is embedded into the surface, can elevate the design of tabletops or cabinetry. Experimenting with unique shapes, like curved edges or asymmetrical forms, can also make your project stand out. Once you have a vision, create a detailed blueprint that includes measurements, joinery types (like dovetail or mortise-and-tenon), and a list of materials. Testing your design with a small-scale model or scrap wood can help you refine proportions and identify potential challenges. For a step-by-step example, our tutorial on how to build a custom wooden coffee table walks you through the design and building process.

Step 1: Define Your Vision
Purpose: What’s the function of your piece? A coffee table for your living room, a jewelry box for gifting, or floating shelves for storage?
Style: Consider your home’s aesthetic—modern, rustic, minimalist, or eclectic. Sketch ideas or use design software like SketchUp.
Dimensions: Measure your space to ensure the piece fits perfectly. For example, custom floating shelves can be tailored to a specific wall size.
Step 2: Add Personal Touches
Engravings: Carve initials, dates, or patterns for a personal touch, especially on jewelry boxes.
Inlays: Incorporate contrasting wood or metal inlays for a unique look, common in custom tabletops.
Unique Shapes: Experiment with asymmetrical designs or curved edges to stand out.
Step 3: Create a Blueprint
Sketch detailed plans, including measurements, joinery types (e.g., dovetail, mortise-and-tenon), and materials.
Use templates or online plans as a starting point, adapting them to your vision. For inspiration, see our DIY Custom Coffee Table guide.
Step 4: Test Your Design
Build a small-scale model or prototype with scrap wood to test proportions and functionality.
Adjust your plan based on feedback or challenges encountered during prototyping.
Essential Tools for Custom Woodworking
🪚 The 7 Must-Have Tools for Beginner Woodworkers
Having the right tools is critical to executing your custom woodworking projects with precision and ease. For beginners, a basic toolkit can go a long way. A hand saw is an affordable, versatile option for cutting wood to size, while a chisel set allows you to carve details or create joints, especially for projects like those in our guide to unique woodworking projects for beginners. A tape measure and square ensure accurate measurements and straight angles, which are essential for any project. A sander is a must for achieving smooth, polished surfaces, particularly for pieces like jewelry boxes that demand a refined finish.
As you progress, intermediate tools can enhance your capabilities. A jigsaw or circular saw enables precise cuts for complex designs, such as the curved edges of floating shelves. A router is invaluable for adding decorative edges or inlays to custom furniture, giving your work a professional touch. Clamps are essential for securing pieces during assembly, ensuring strong, stable joints. For advanced woodworkers, a table saw is ideal for ripping large boards for furniture like coffee tables, while a drill press ensures precise holes for dowels or hardware. A planer can smooth wood surfaces for a flawless finish, elevating the quality of your custom builds. If you’re working on a budget, our guide on the best tools for custom woodworking on a budget recommends affordable options that don’t compromise quality.
Mastering Woodworking Techniques for Custom Projects
To create truly unique woodworking projects, you’ll need to master a few key techniques that add both functionality and flair. Joinery is the backbone of sturdy furniture. Dovetail joints, which interlock like puzzle pieces, are both strong and decorative, making them perfect for drawers or jewelry boxes. Mortise-and-tenon joints provide exceptional strength for furniture like tables or chairs, ensuring longevity. For beginners, pocket holes offer a quick, easy way to assemble projects like floating shelves or frames, requiring minimal skill but delivering solid results.
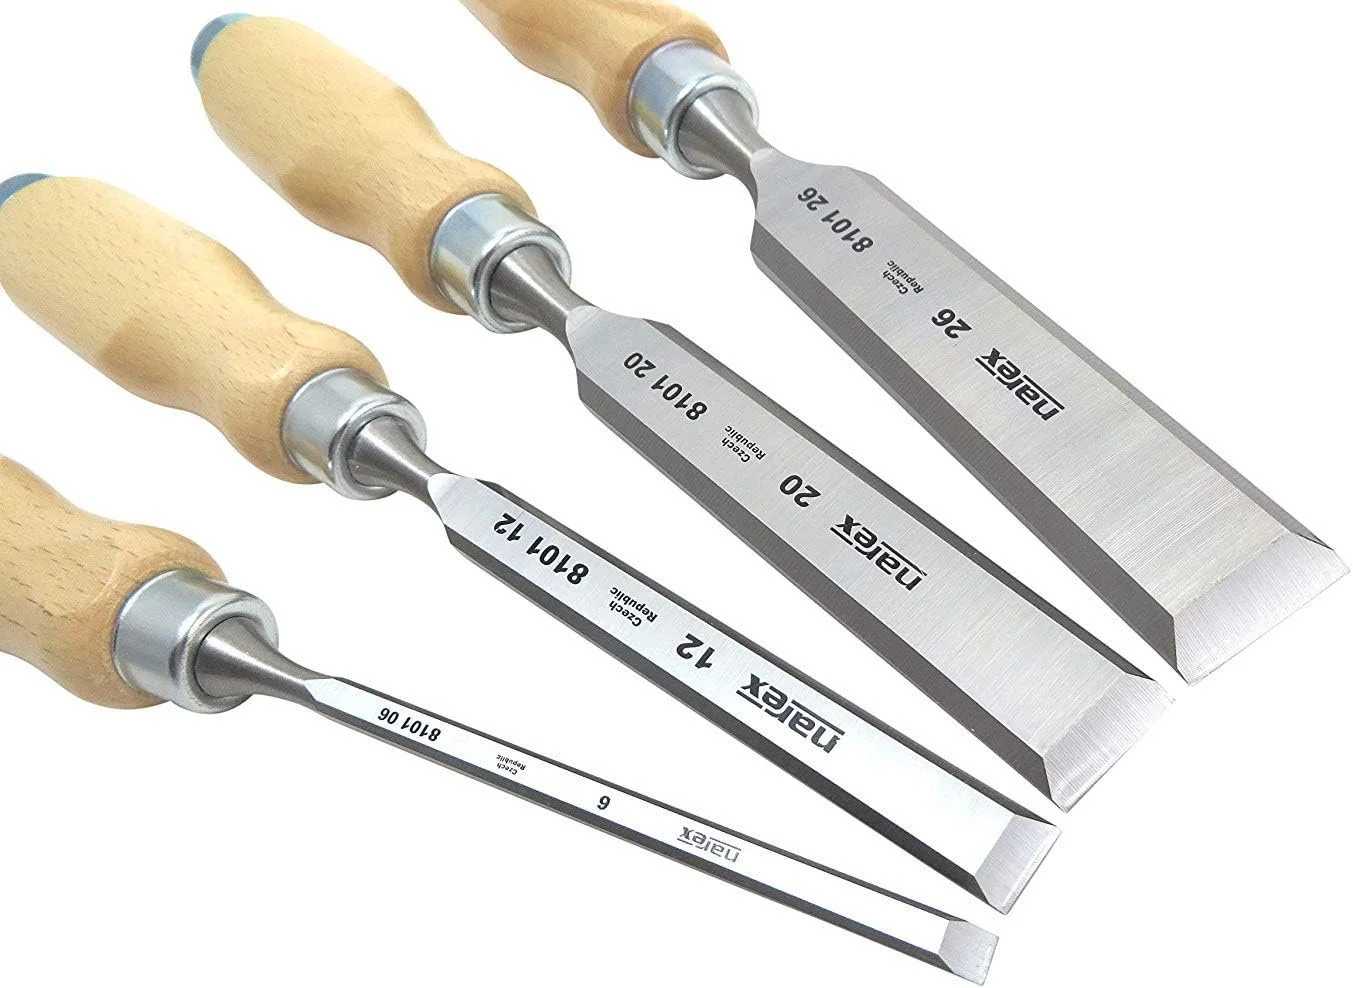
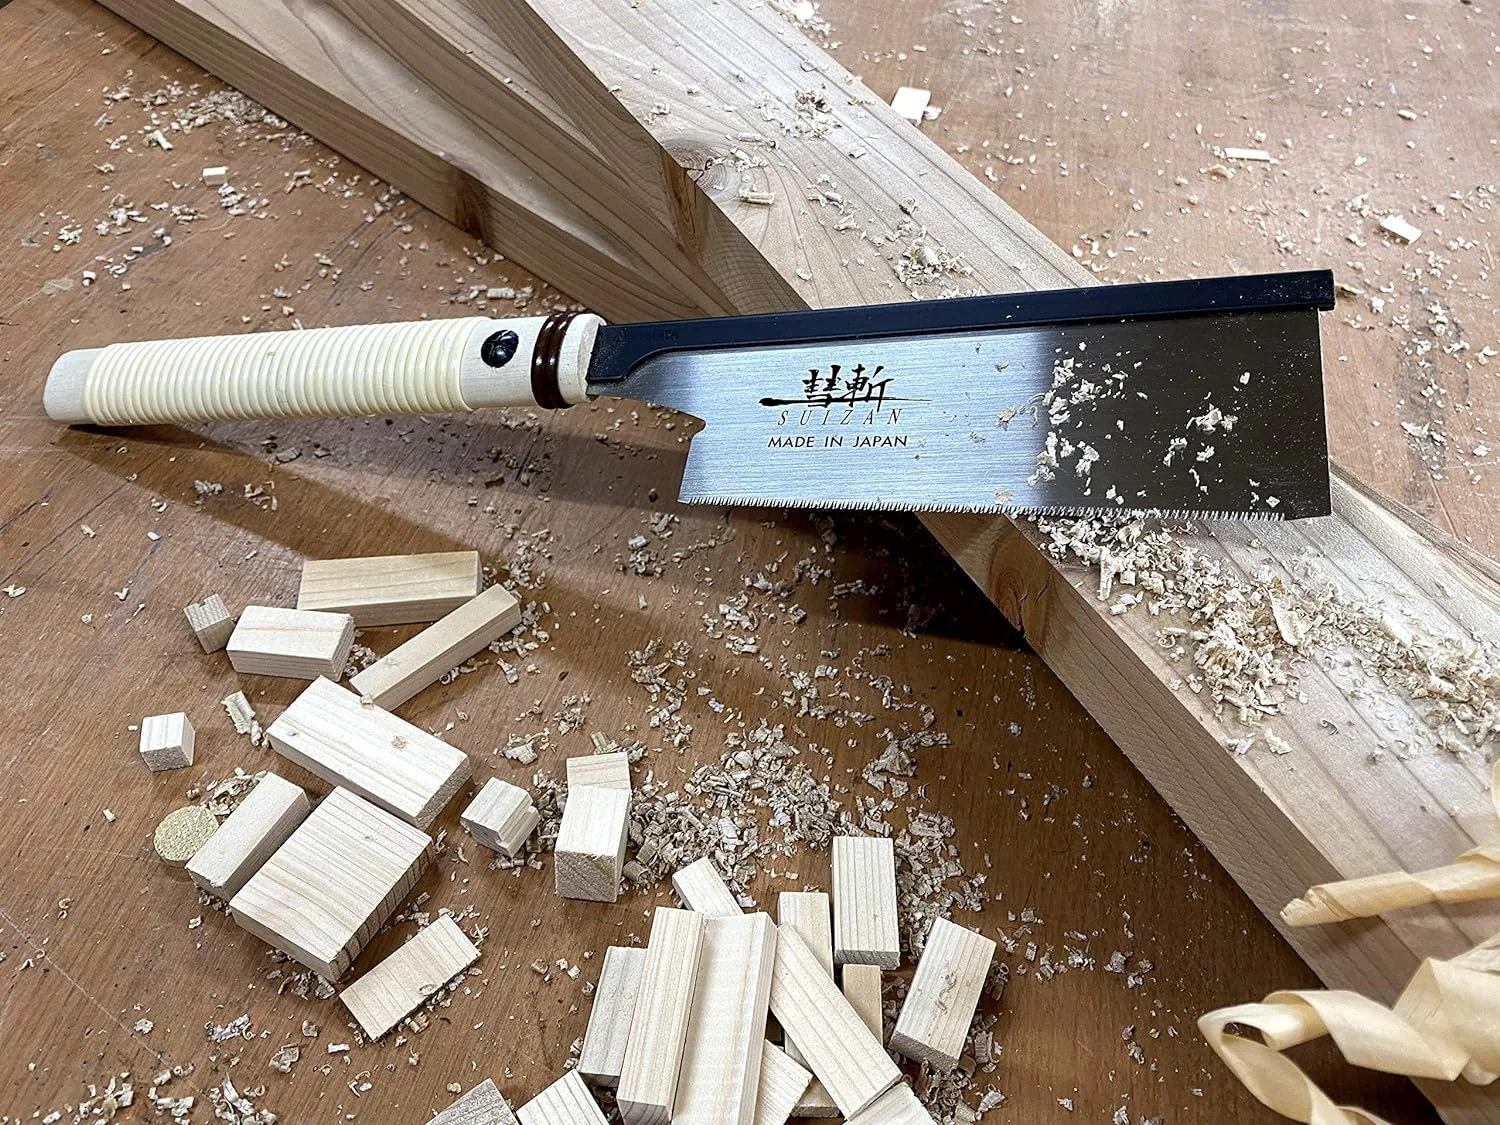

Chisels, Dovetail Saw, Pocket Hole Jig
Finishing techniques are equally important for custom projects. Staining enhances the wood’s natural grain and color, allowing you to achieve the desired aesthetic—test stains on scrap wood to ensure the perfect shade. Applying polyurethane or wax protects surfaces and adds durability, especially for high-use pieces like coffee tables. For a bespoke look, hand-rubbed finishes with natural oils create a soft, natural sheen that highlights the wood’s beauty. Decorative techniques can set your project apart. Wood carving allows you to add patterns or text, ideal for personalized touches on beginner projects. Inlays, such as embedding contrasting wood into a tabletop, create striking visual effects. Distressing, achieved by sanding edges or adding intentional wear, gives pieces a rustic, lived-in charm.
Step-by-Step Process for Your Custom Woodworking Project
Bringing a custom woodworking project to life requires a clear, systematic approach. Begin by finalizing your blueprint, ensuring all measurements, materials, and joinery methods are clearly defined. Gather your materials, including wood, hardware, and finishes, based on your design specifications. Next, cut and shape the wood using saws and routers to create the components of your project. Assemble the pieces using your chosen joinery method, ensuring stability and alignment with clamps. Sand the surfaces to achieve a smooth finish, starting with coarse sandpaper and progressing to finer grits. Finally, apply your chosen finish, whether it’s a stain, polyurethane, or hand-rubbed oil, to protect and enhance the wood’s appearance.
Throughout the process, attention to detail is key. Double-check measurements before cutting to avoid costly mistakes. Test joinery on scrap wood to ensure a tight fit. Apply finishes in a well-ventilated area to achieve an even coat. If you’re new to woodworking, start with a simpler project like those in our guide to unique woodworking projects for beginners to build confidence. For a specific example, our tutorial on creating a custom wooden jewelry box provides a detailed walkthrough of the process, from design to finishing.
Plan and Design: Finalize your blueprint, including measurements and materials.
Gather Materials: Source wood, hardware, and finishes based on your design.
Cut and Shape: Use saws and routers to cut wood to size and shape components.
Assemble: Join pieces using your chosen joinery method, ensuring stability.
Sand and Finish: Smooth surfacesಸ
Bringing It All Together
Custom woodworking projects offer a unique opportunity to create pieces that reflect your style, meet your needs, and stand the test of time. By carefully selecting the right wood, designing with intention, and using the appropriate tools and techniques, you can craft furniture and decor that are both functional and deeply personal. Whether you’re building a custom coffee table to anchor your living room, floating shelves to maximize a small space, or a jewelry box as a heartfelt gift, the process is as rewarding as the final product. Explore our related guides, such as how to build custom floating shelves or the best tools for custom woodworking on a budget, to dive deeper into specific projects and techniques. With practice and creativity, your custom woodworking projects will become cherished additions to your home and legacy.