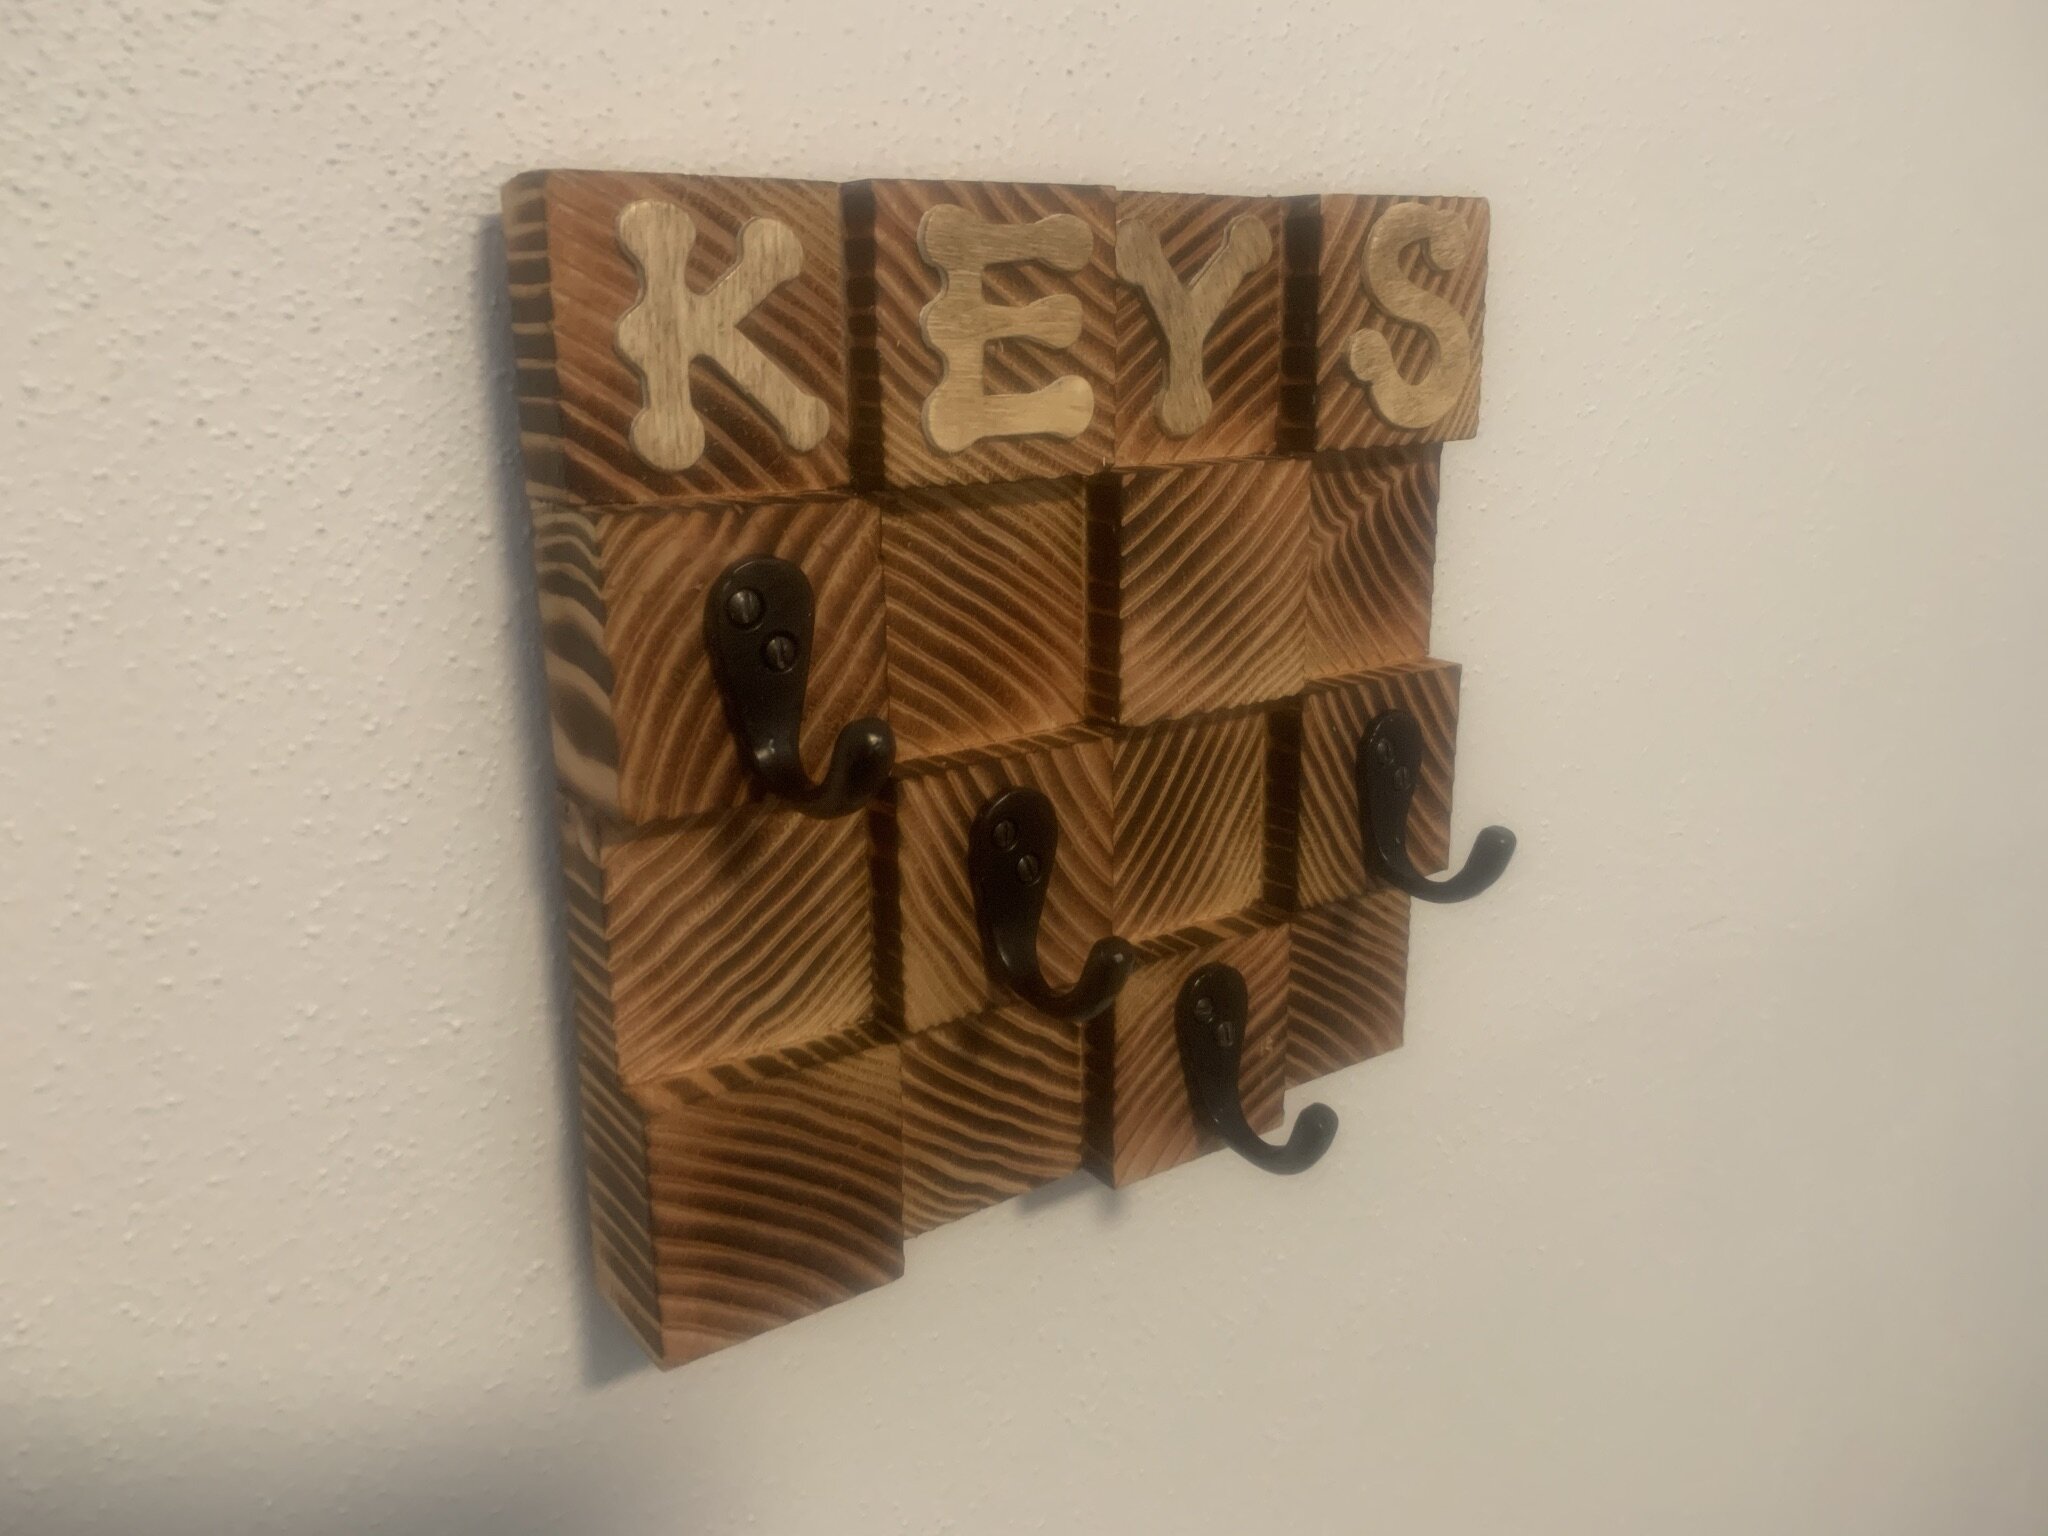
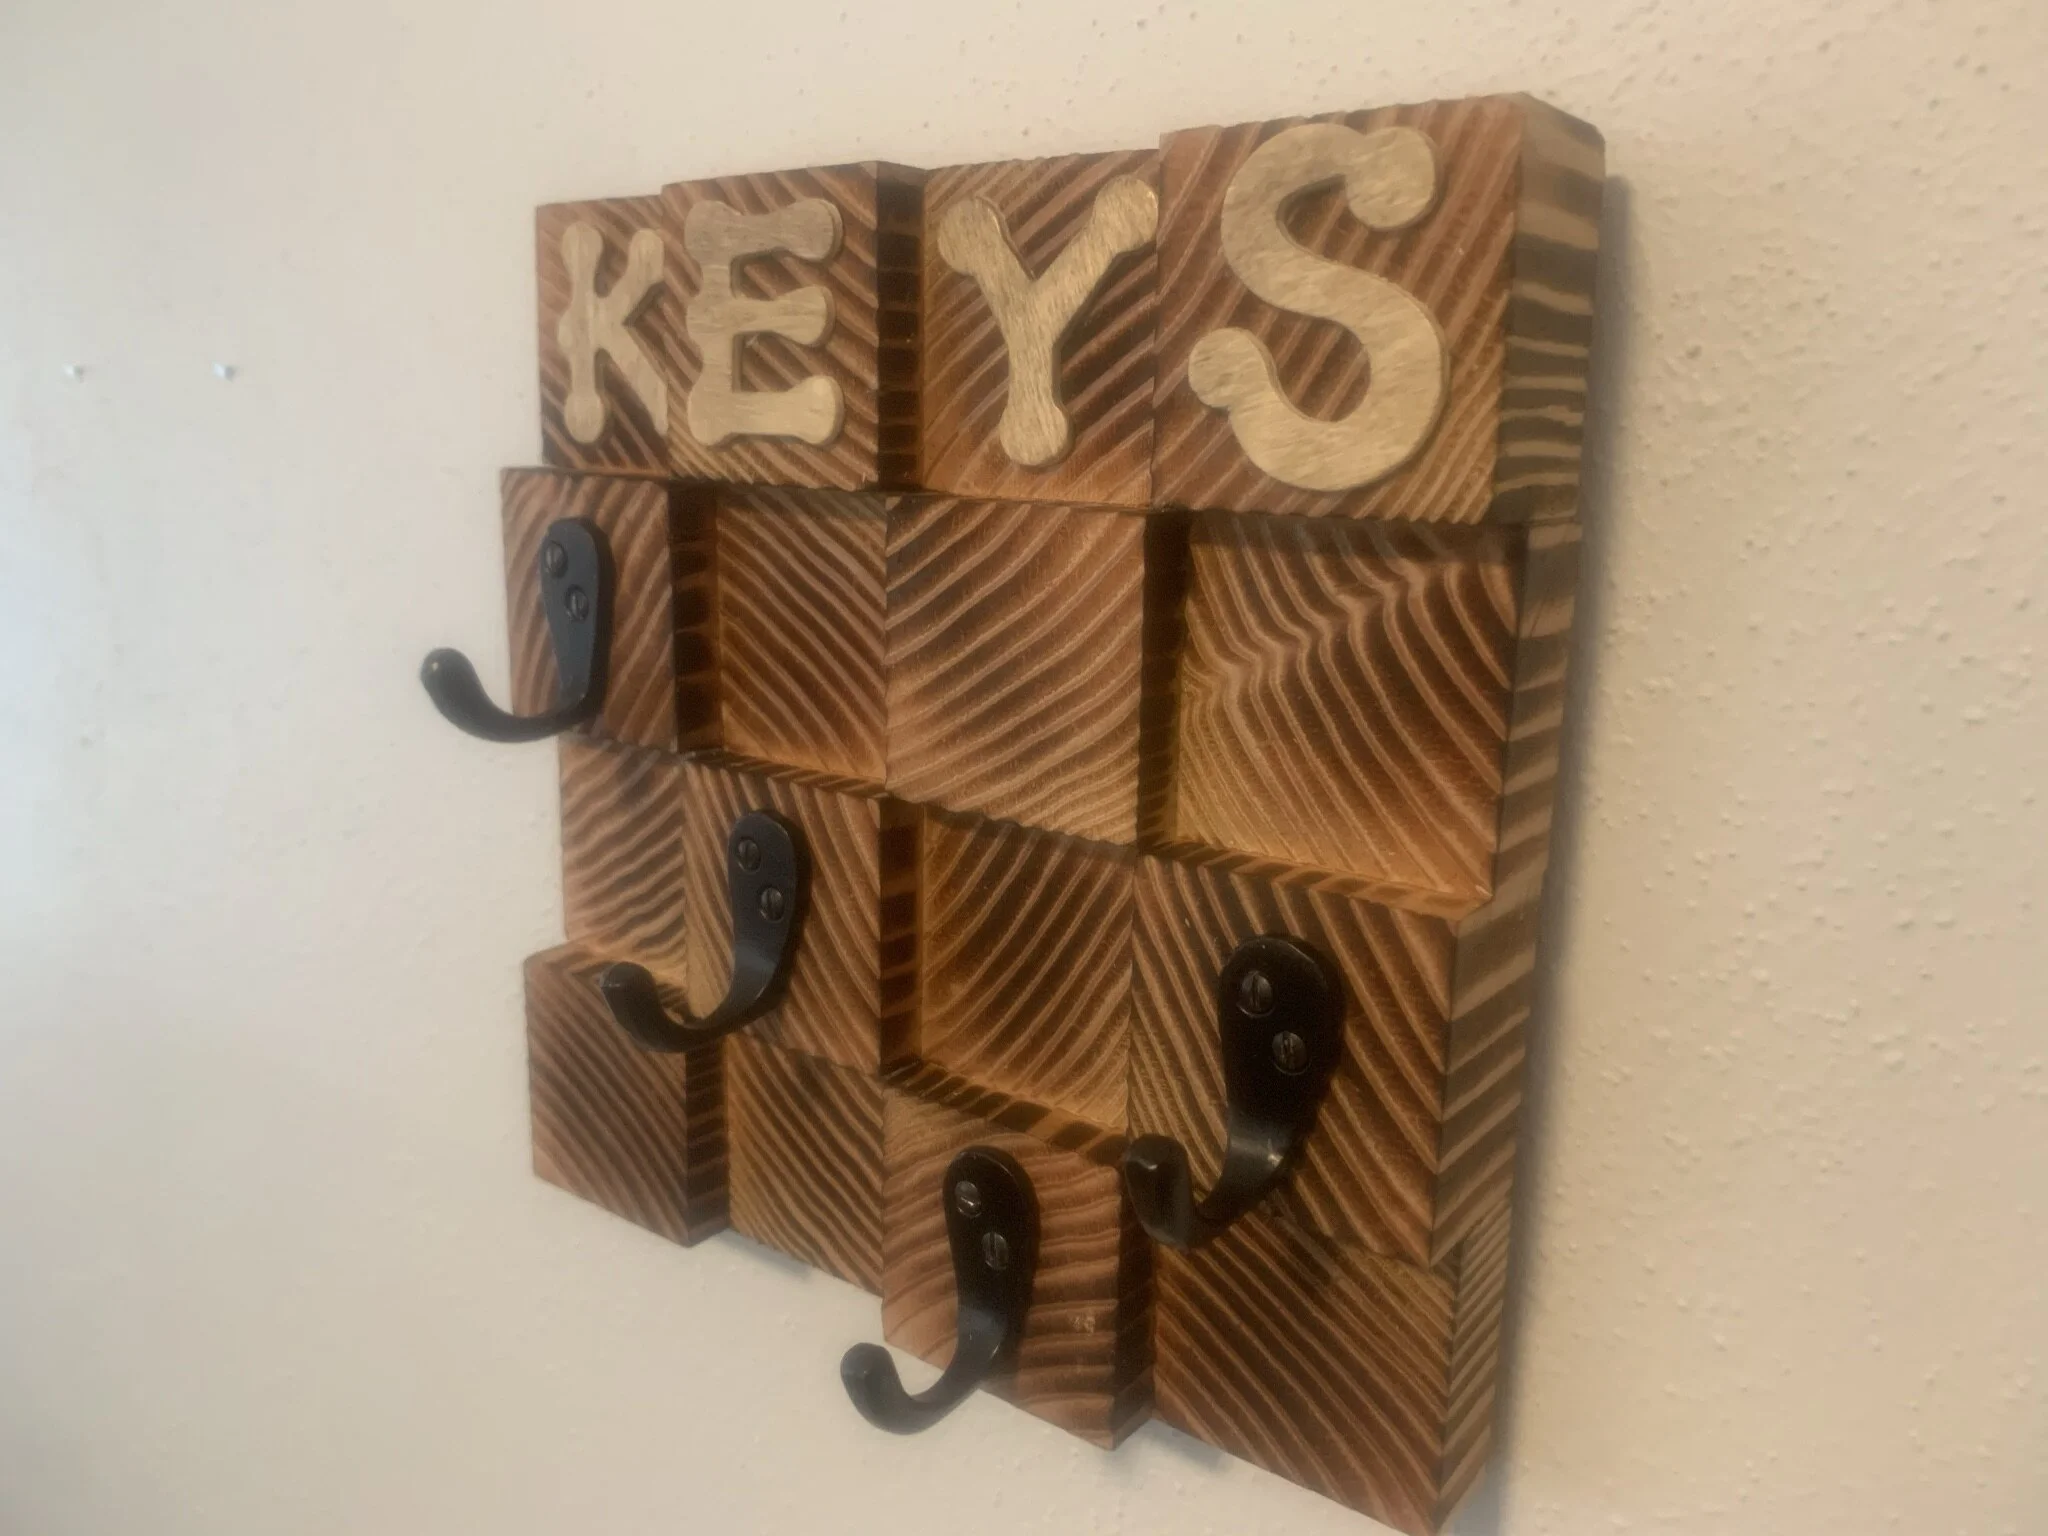
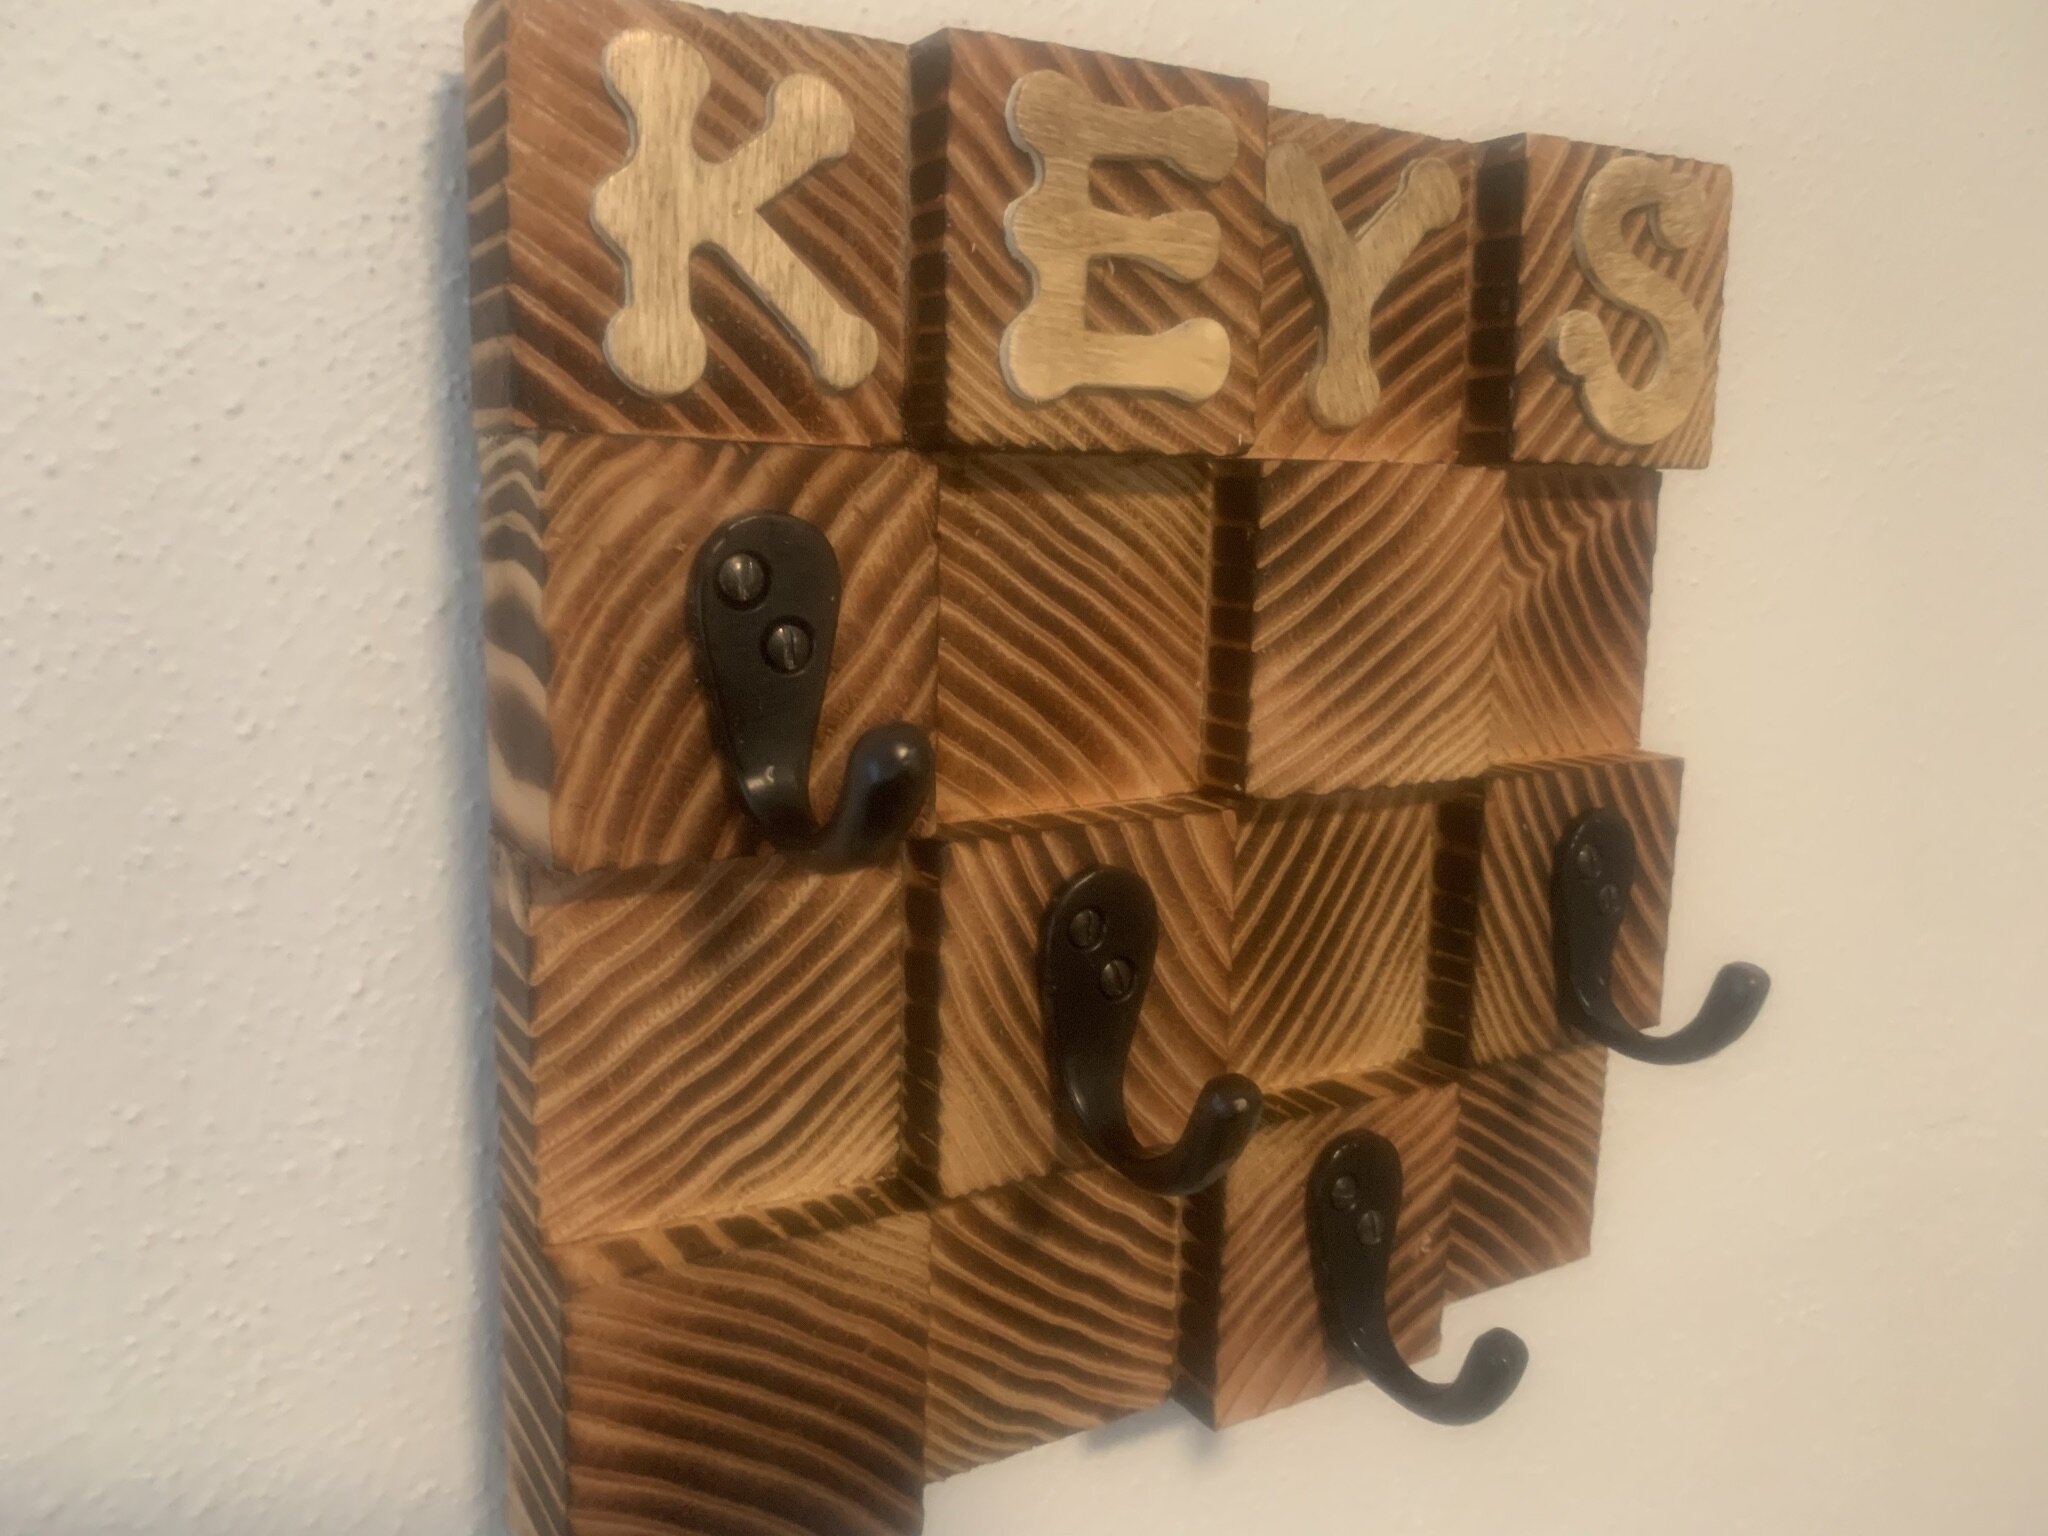
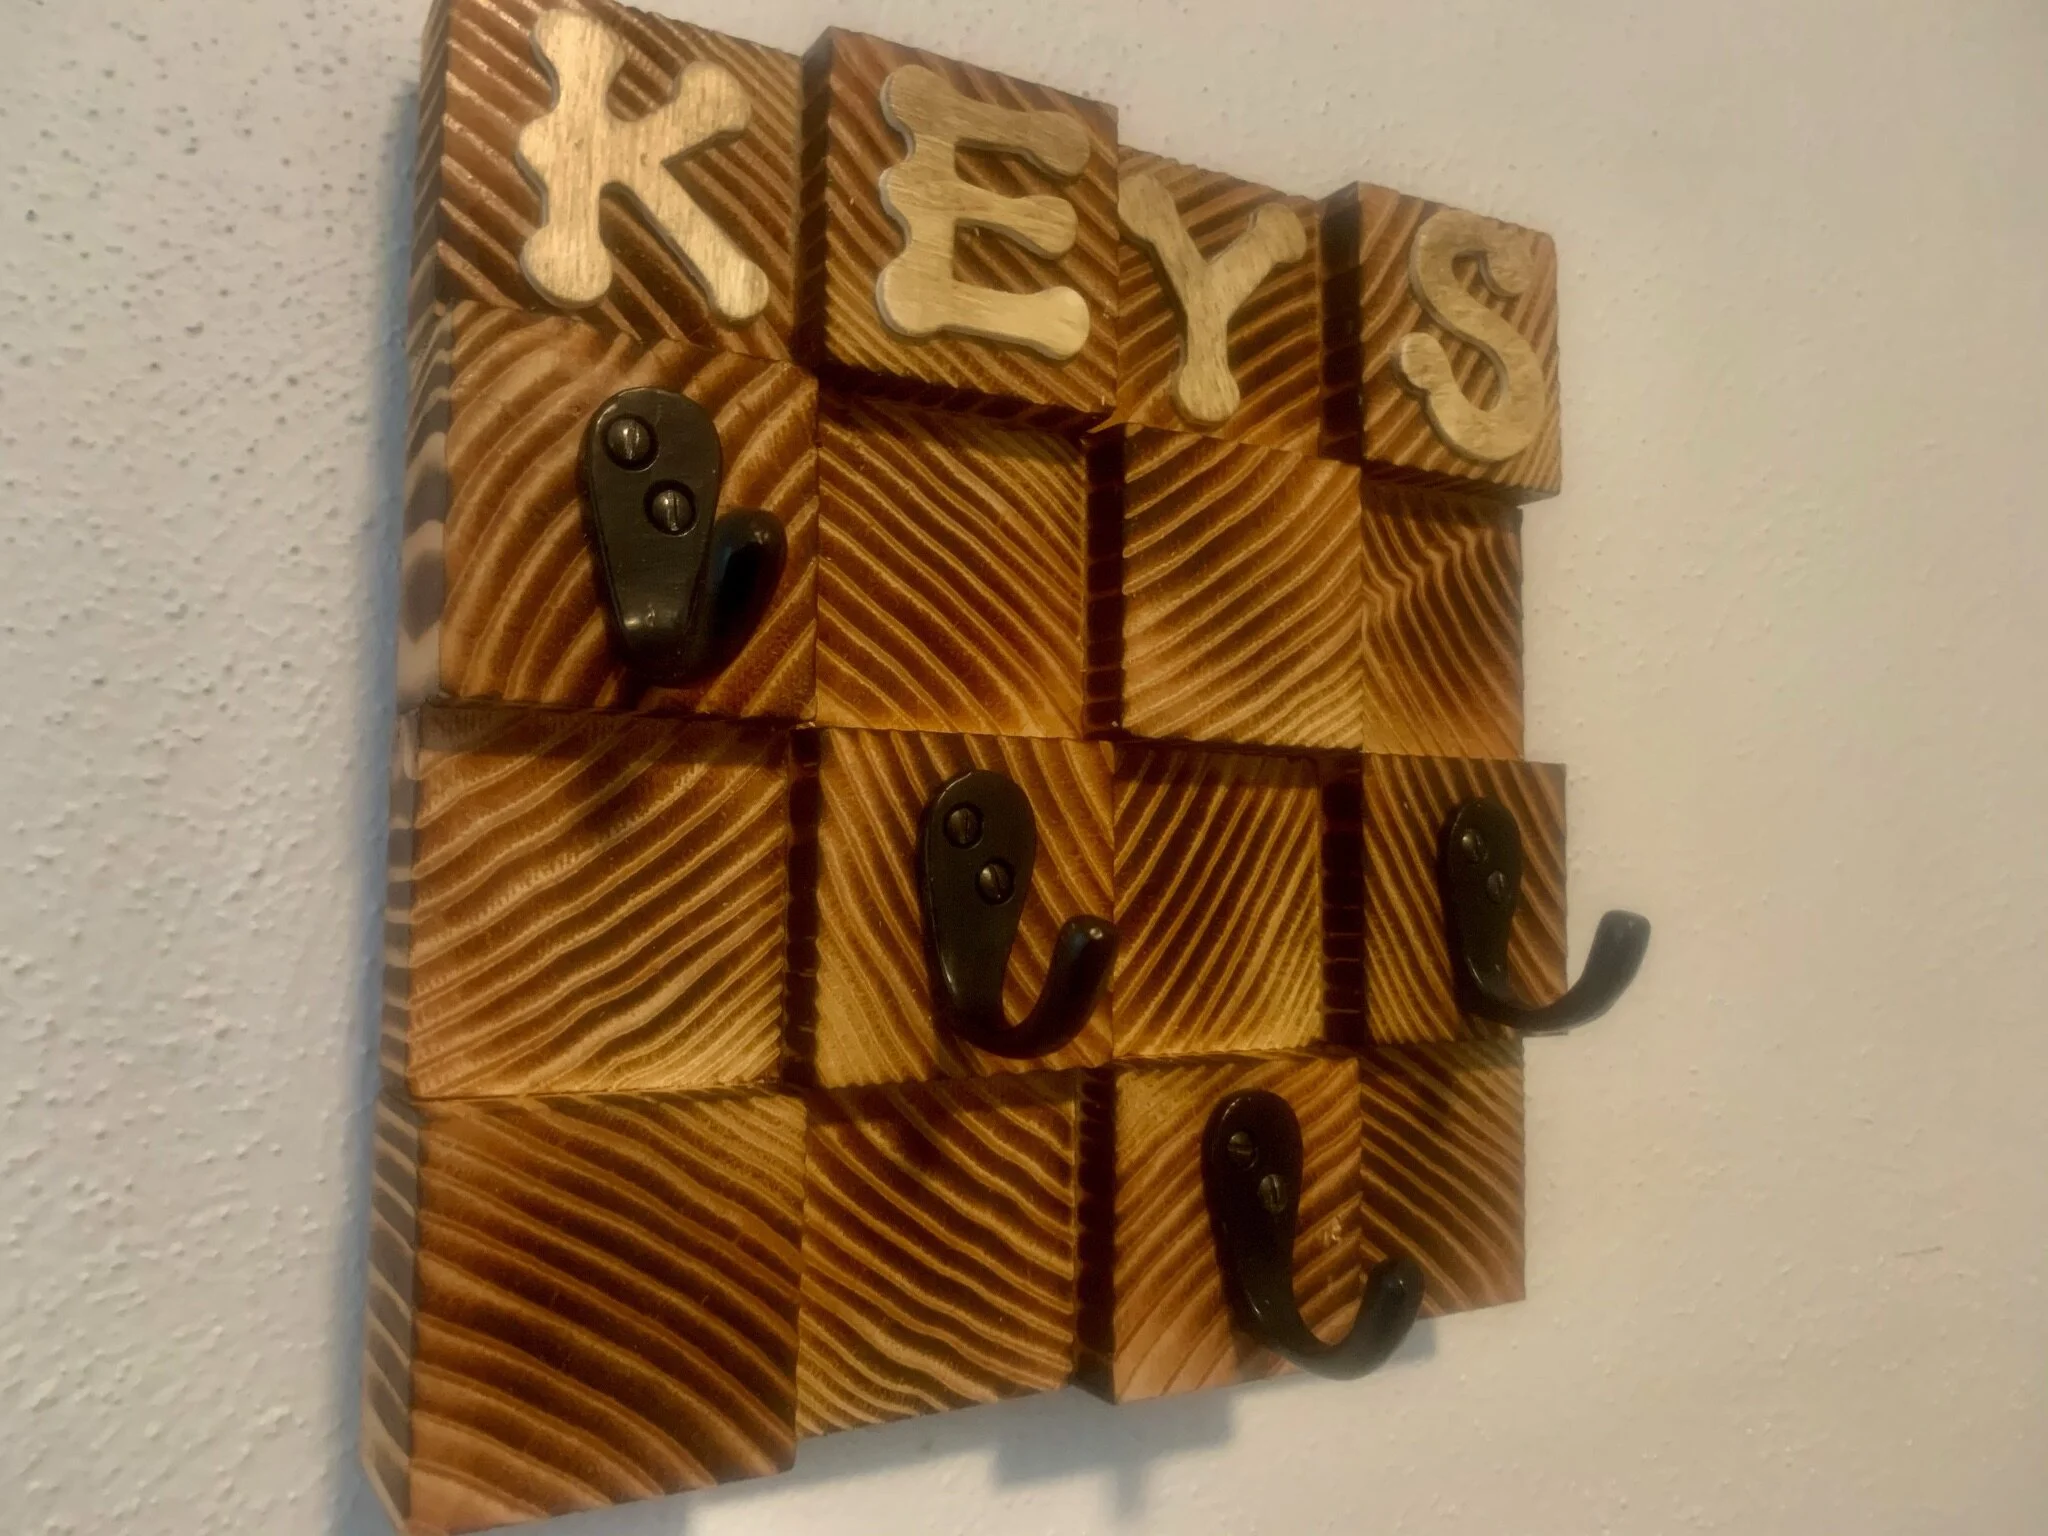
Shou Sugi Ban Key Holder/Rack // DIY
You put the keys in the key bowl. (This is actually a song) Where da keys at?
Do you constantly struggle to find your keys? Is your toddler hiding your keys in their toys? Flushing them down the toilet? Freezing them in blocks of ice in the freezer? Throwing them off the roof? Trying to feed them to the dog? Well fear no more, I have the solution. This basic key holder made from blocks of wood glued together with key hooks screwed in. You can burn it with a torch, or don’t burn it with a torch, stain it, paint it, leave it natural, I don’t care. If you make one it’s going on your wall, not mine. I won’t have to look at it. Plus, you can hang your keys on it and prevent all those issues we discussed earlier…assuming you actually use it and don’t leave your keys at the bottom of the purse, like my wife. Then I can’t find them when I need to drive her car for whatever reason. I say “her car” because it was a push present for our first child. It’s actually in my name and all the unpaid parking tickets are going to get ME arrested, not her. Anyway, I shouldn’t be airing our dirty laundry on the internet…but how do you even know any of this is true? I can untie any knot. I'm serious. Name a knot, any knot. Go ahead….Do you believe me? You shouldn't believe everything you hear. In fact, there are many knots that I cannot untie. See, you have no idea what’s true and what isn’t. Maybe there isn’t even a post down below explaining how to make this.
Ok, you are in fact going to find out how I made this. If you’re smart, you should be able to do this just by looking at the picture but here is what you’ll need:
Tools:
A saw, any kind of saw for cutting wood really but I use THIS ONE
Materials:
4x4 or 2x2
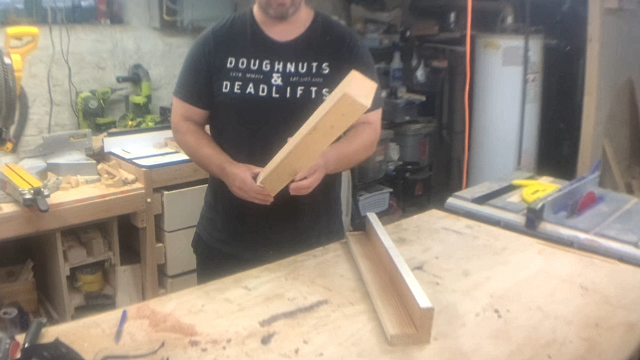
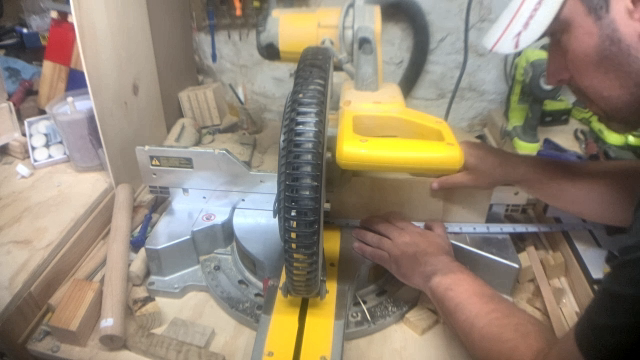
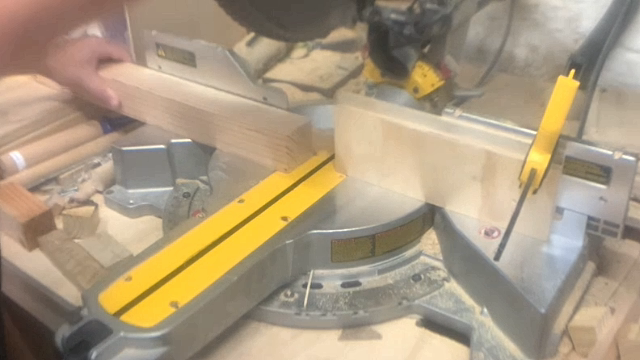
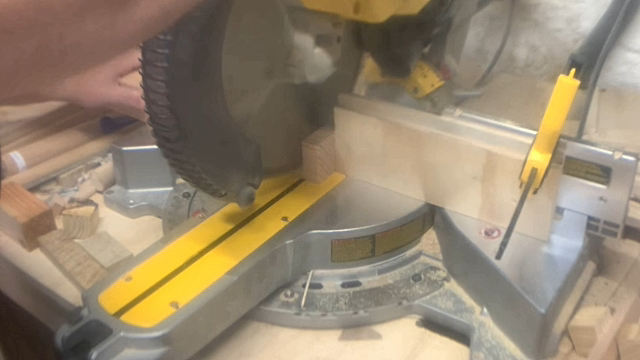
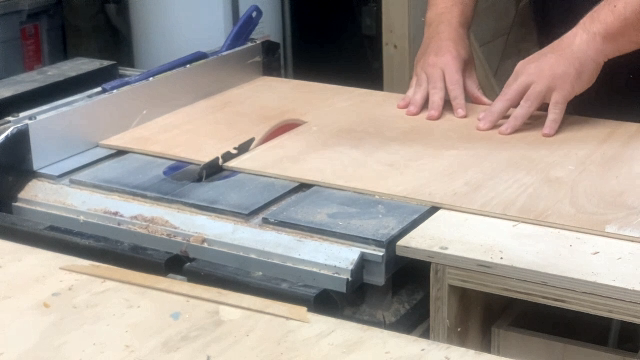
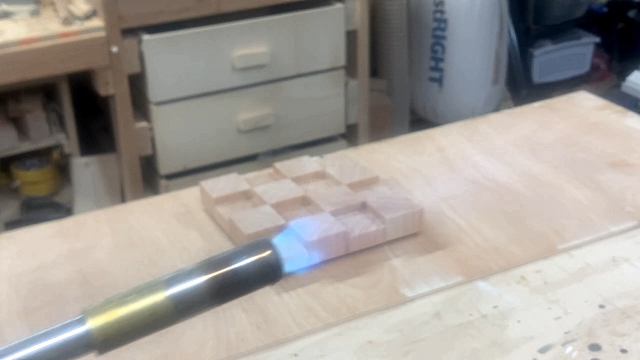
The first thing you’re going to do is decide if you want to use a 4x4 and rip it into an actual 2x2, or use a 2x2 which is 1.5x1.5. If you go the smaller route, you might not be able to use the same hooks I’m using or the same letters. But, I just eyeballed it and ended up ripping a 4x4 (actually a 3.5x3.5, yeah stupid…people have tried to sue and the courts said no. What are you going to do?) So I ripped a 4x4 into 2.25 x 2.25 inches. Then I cut that strip into 3/4 inch thick and 1 inch thick pieces, 8 of each. Your initial 4x4 should be long enough to accommodate all 16 of these pieces. Don’t forget to add 2 additional inches to account for the width of your saw blade. Also add another 6 inches so you’re not cutting your fingers off trying to make the last few cuts.
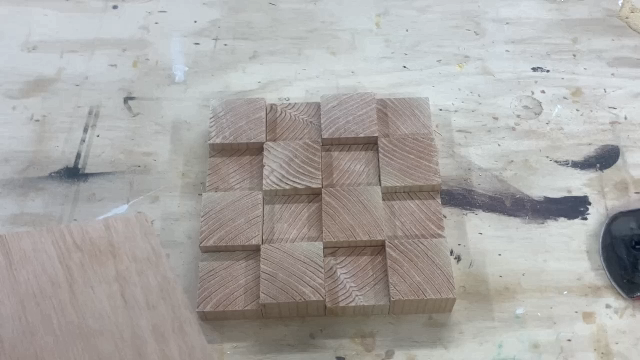
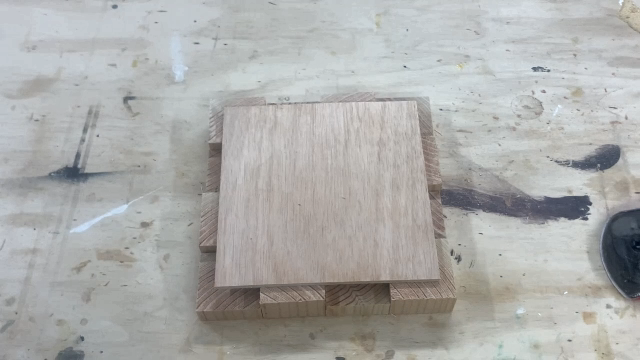
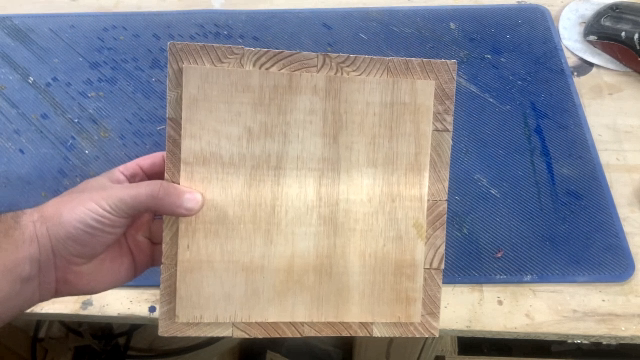
You have two options for this next part. You can make it easy and cut out a backer board to glue all the squares to, or you can make it difficult and try to glue up 16 individual squares. The back panel is about 1/2 inch smaller on each side. I marked each corner of the panel on each of the 4 corner blocks, in an attempt to line them back up when gluing. I cut the backer small so you can see it and it provides a floating look when hanging on the wall.

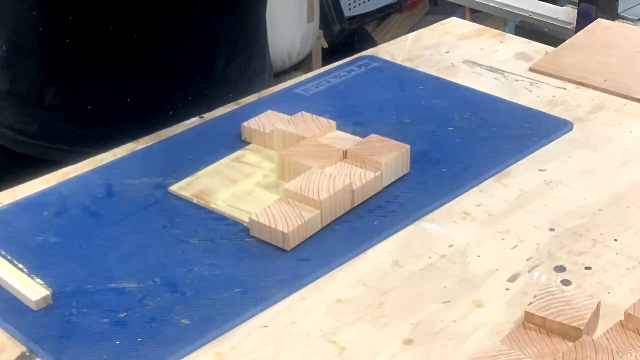
For gluing up, just spread glue all over the back panel and place each square tightly against each other. I put a paint can on top to apply some pressure but it was only applied to the higher pieces. If you can figure out a way to apply pressure to both the higher and lower pieces, do it. Keys aren’t heavy so the blocks aren’t going to be subjected to much force. The glue should dry well enough to hold the blocks even if you don’t apply any pressure.
While you’re here, if you like what I’m doing, please consider clicking the button below and supporting me. I really enjoy sharing my terrible wit with everyone.
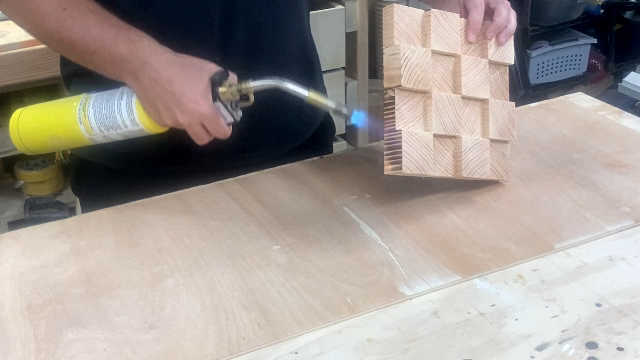
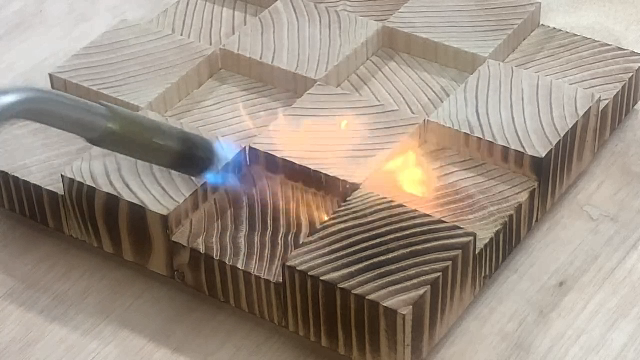
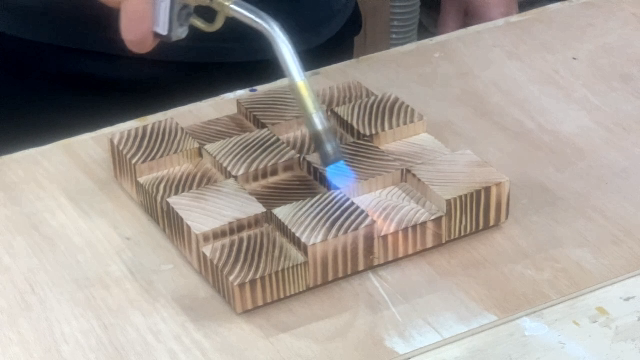
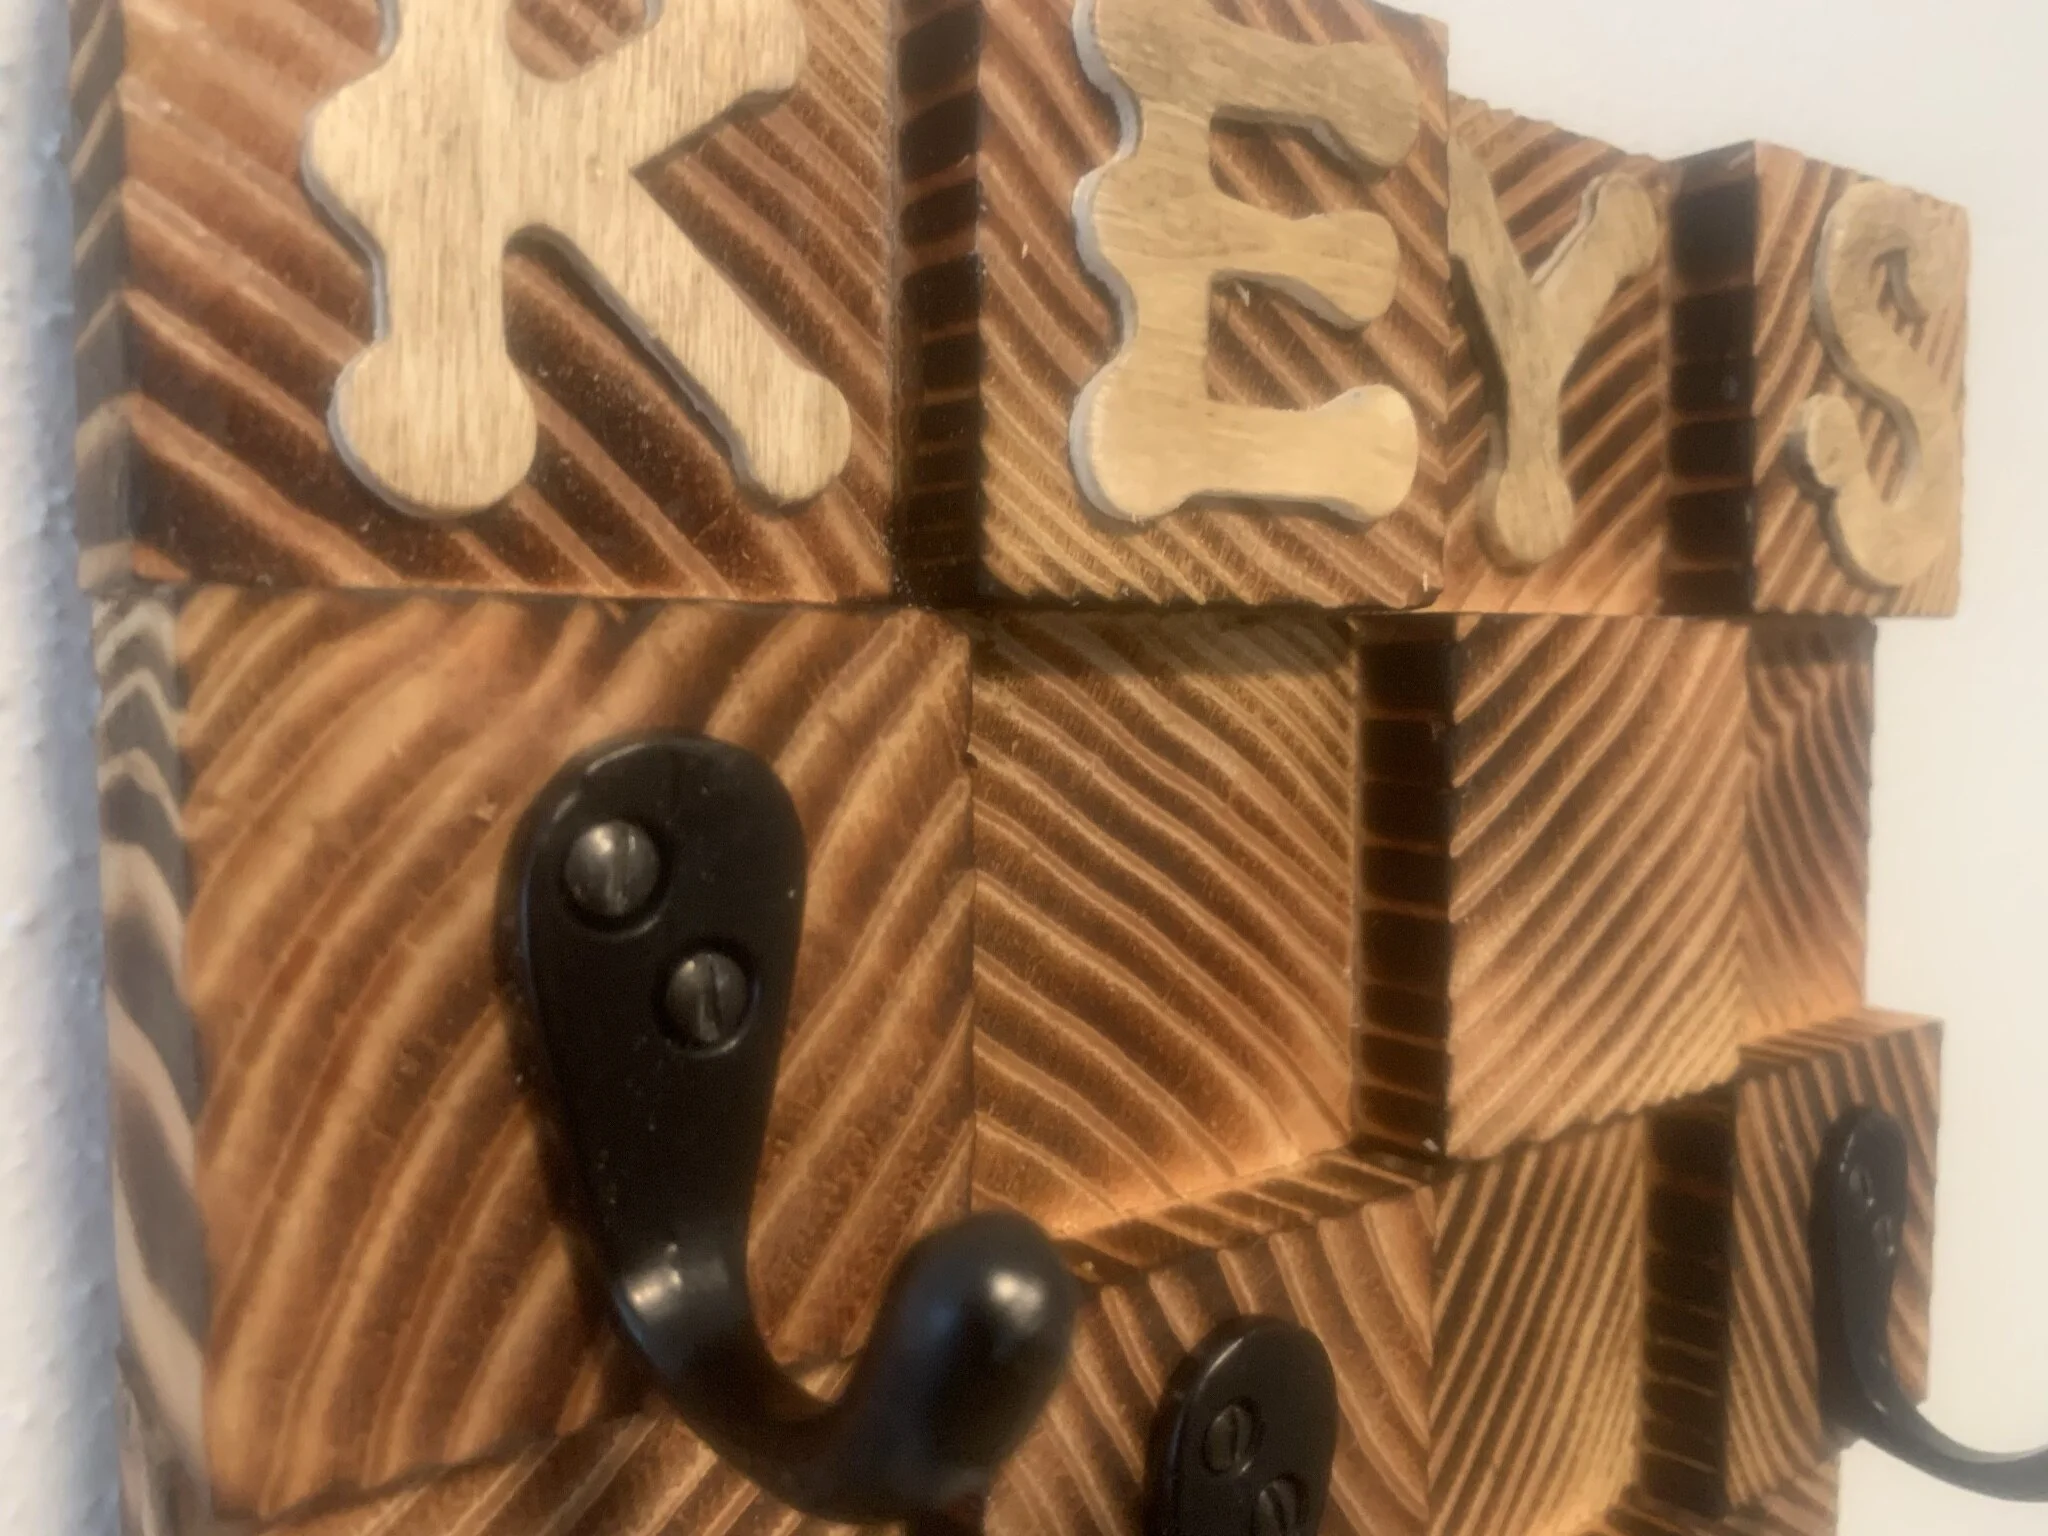
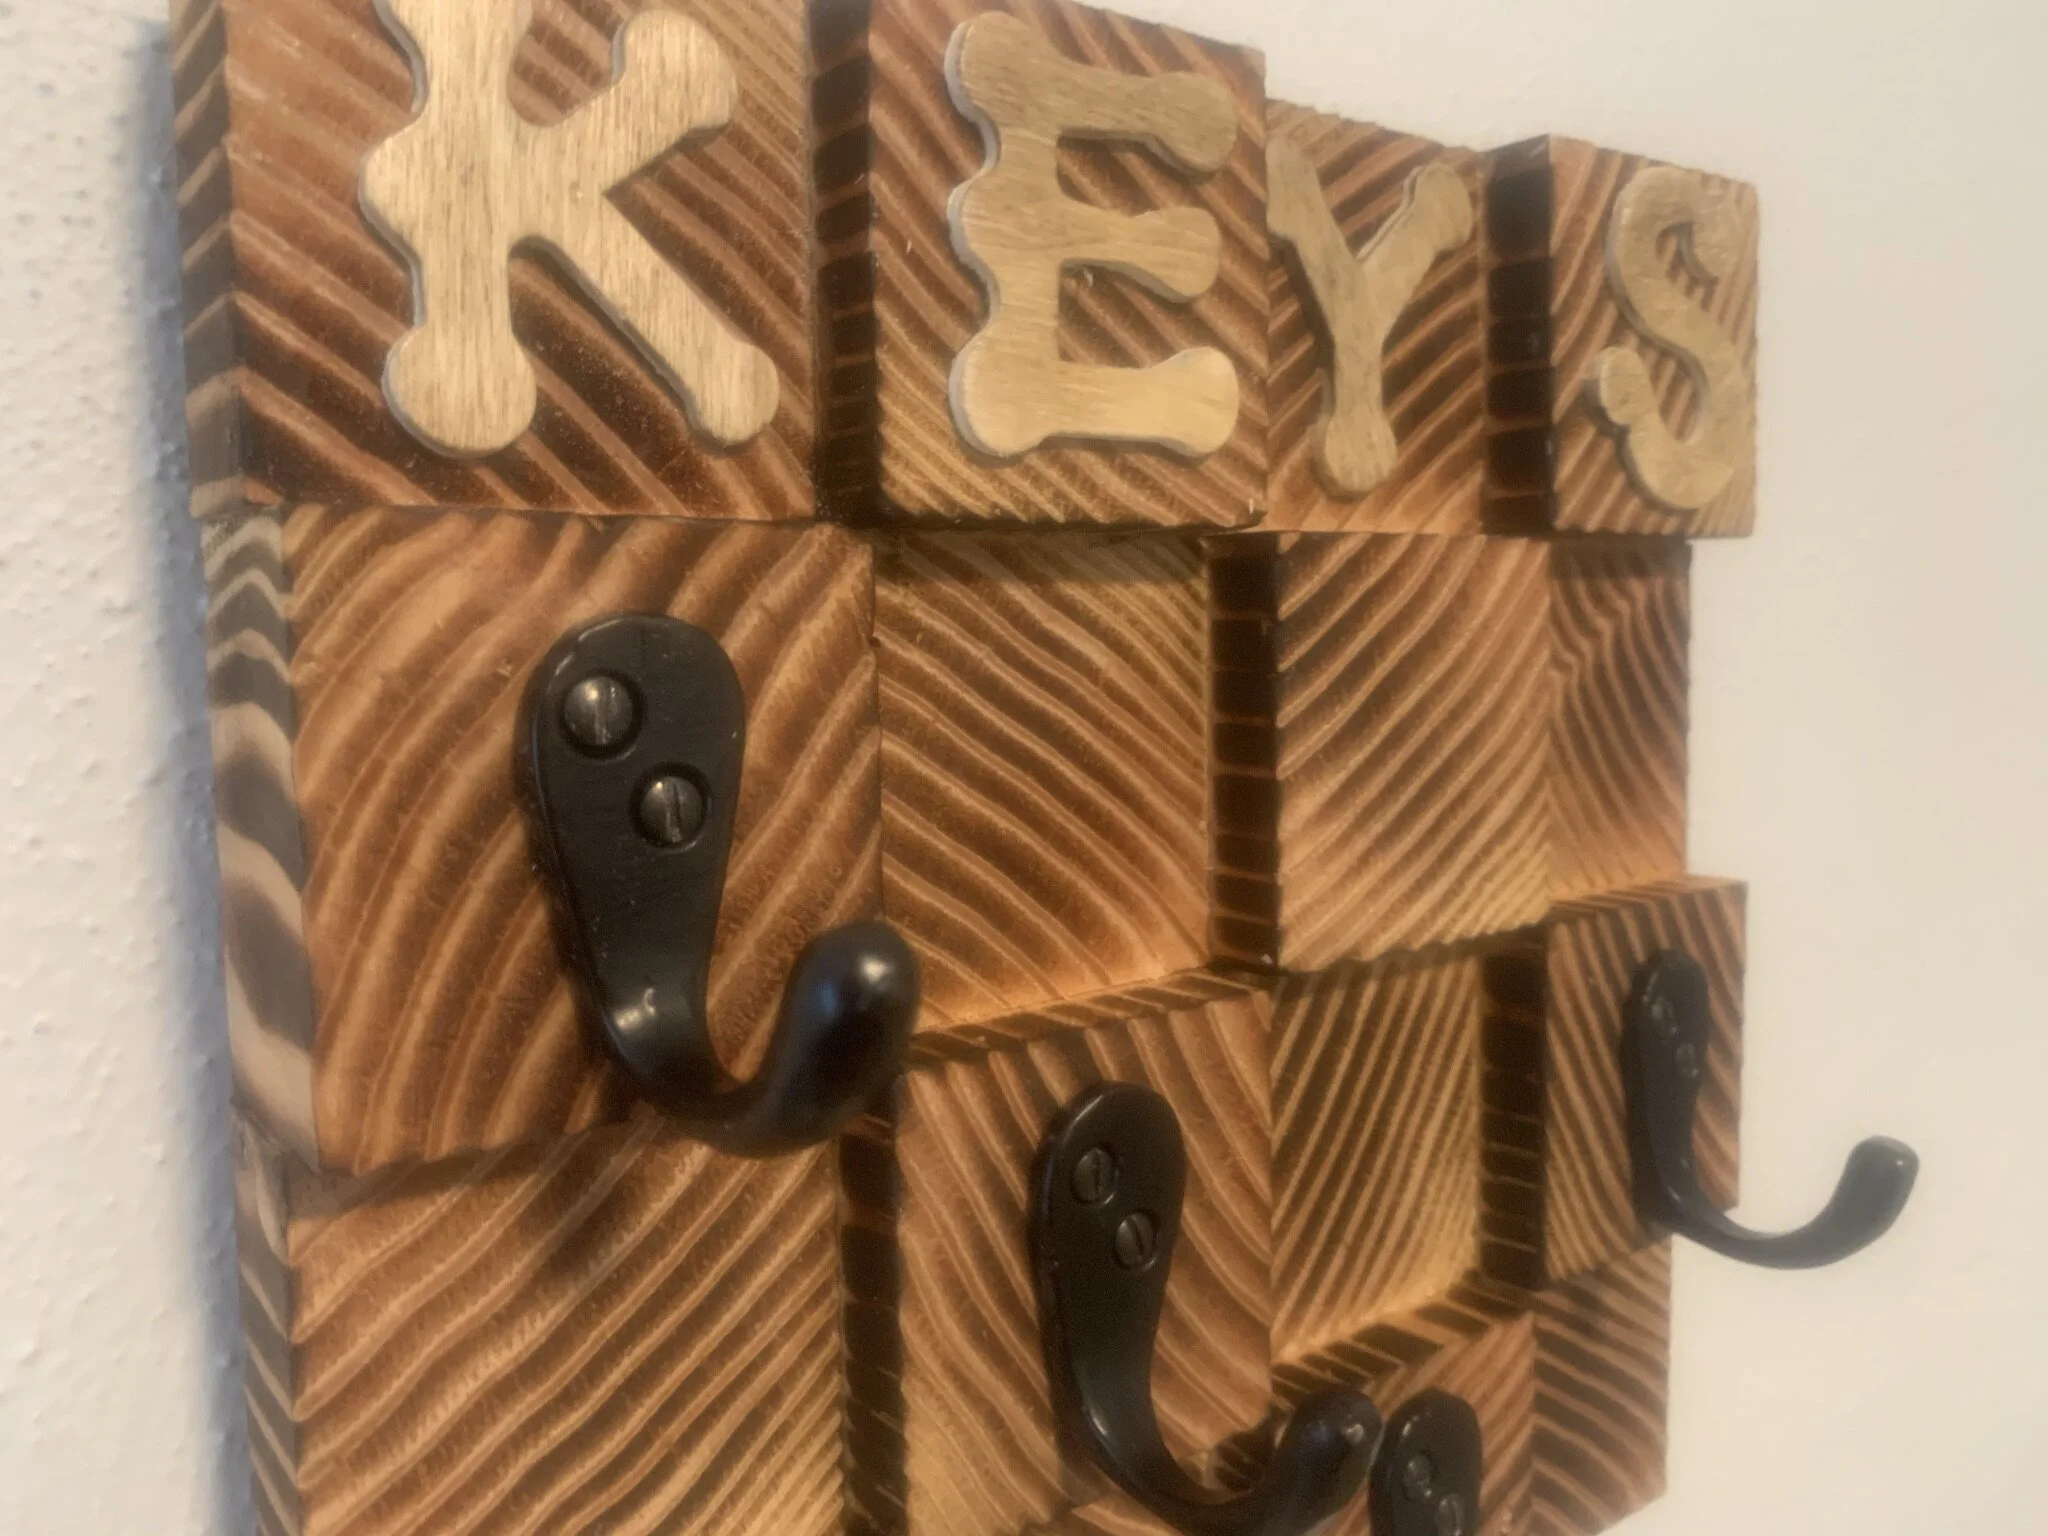
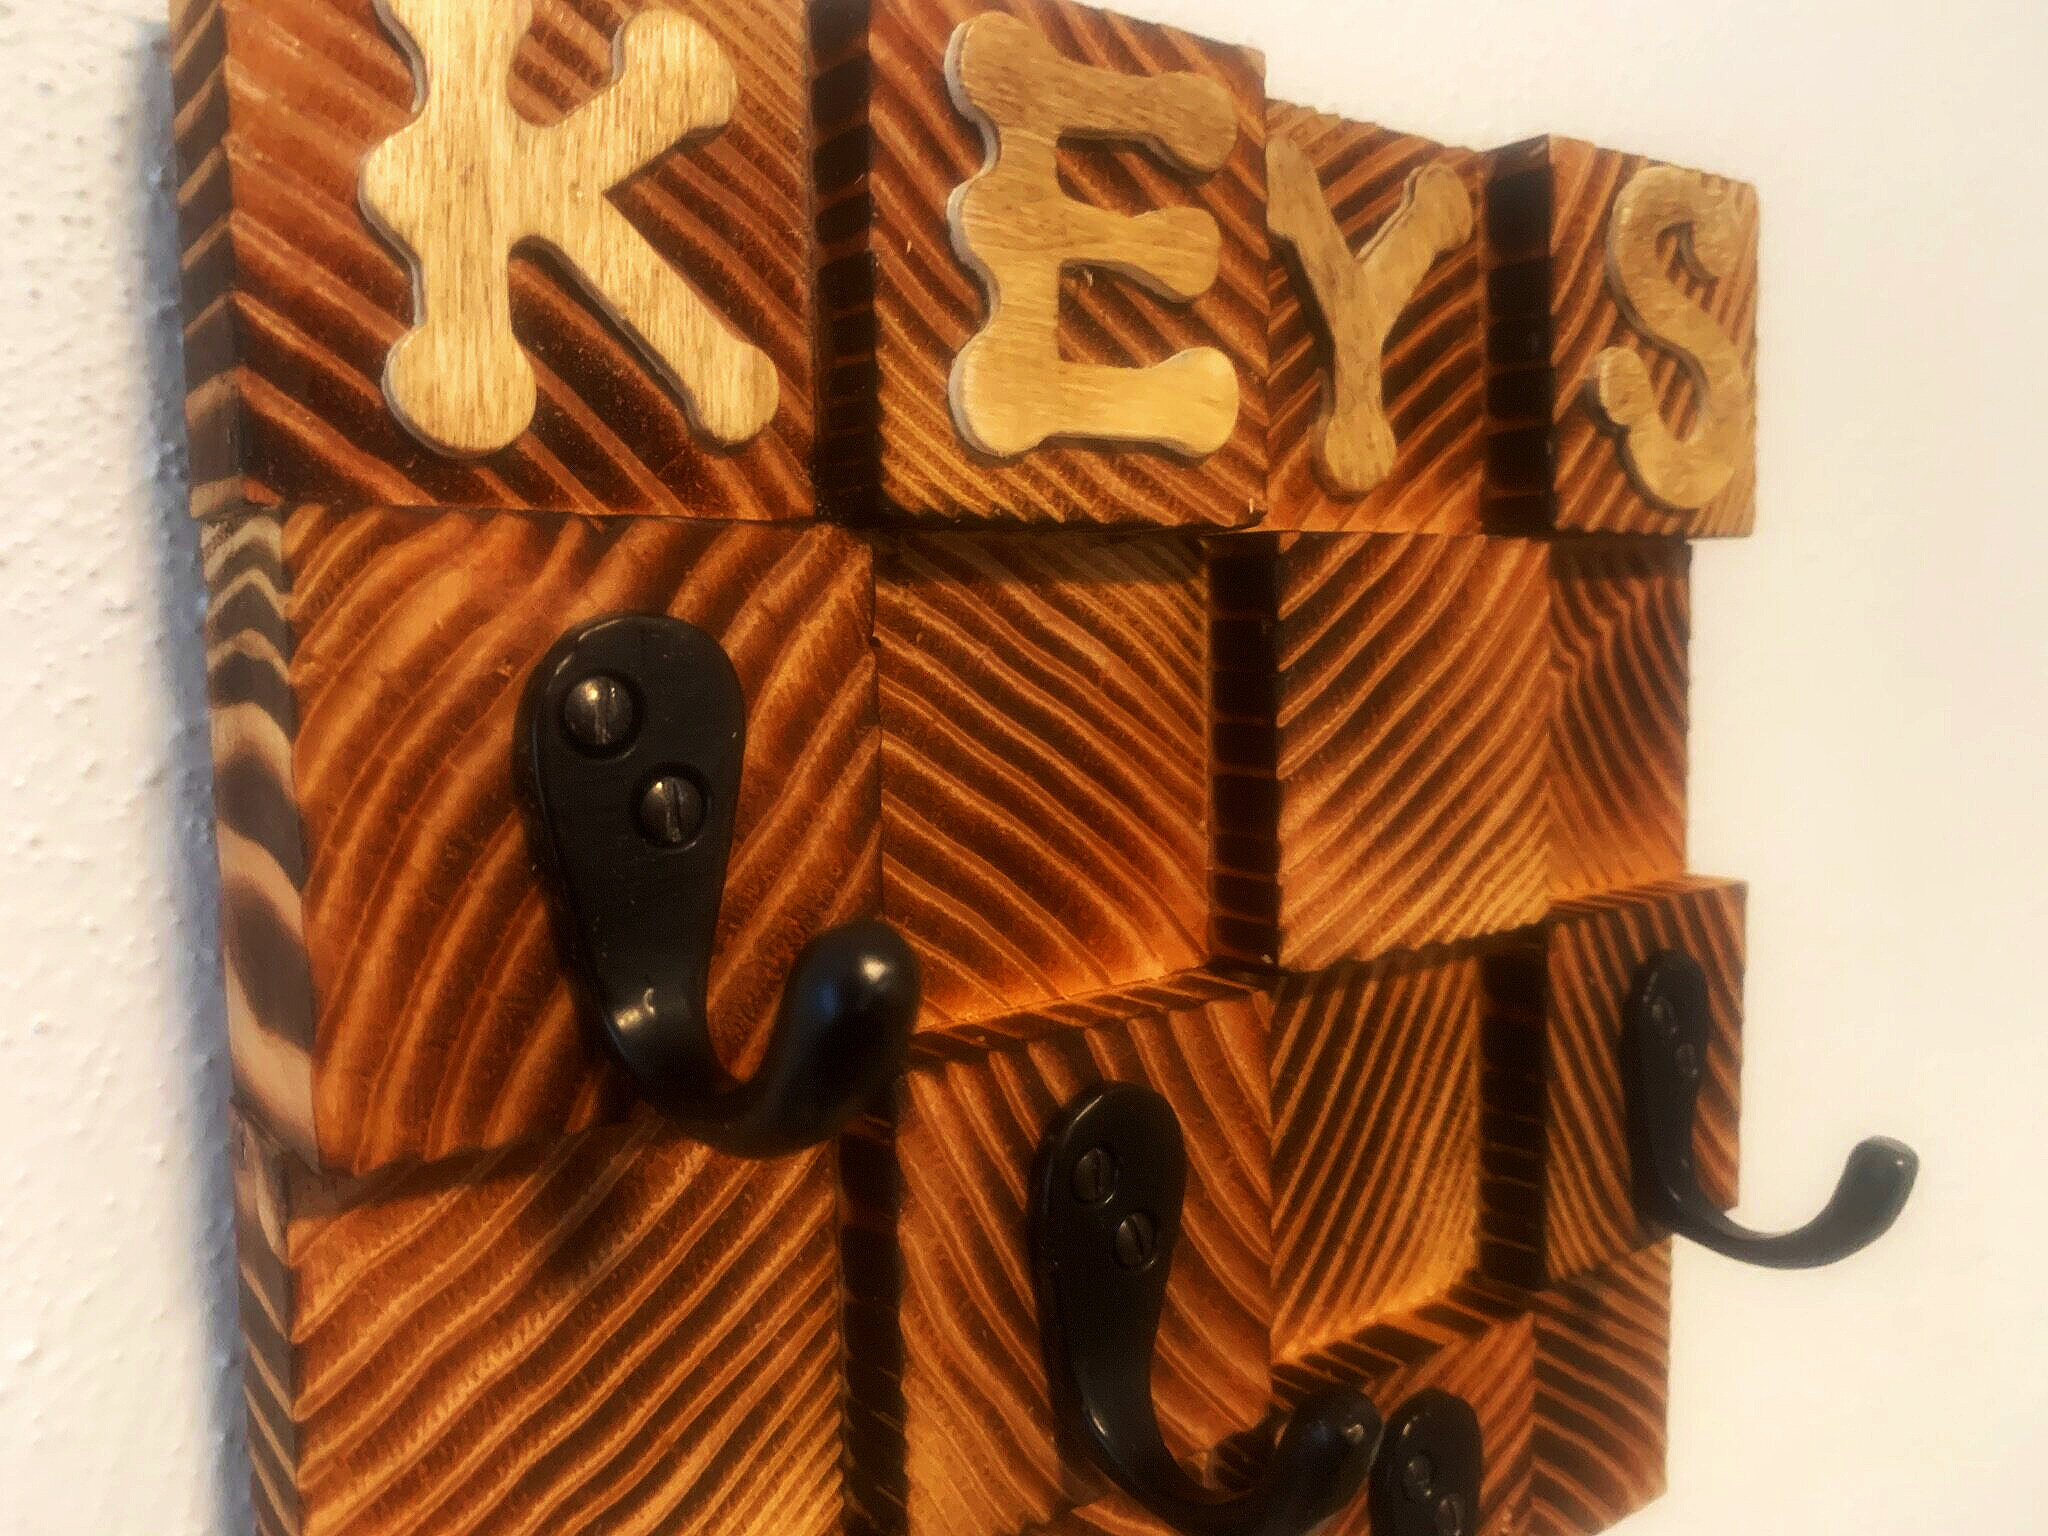
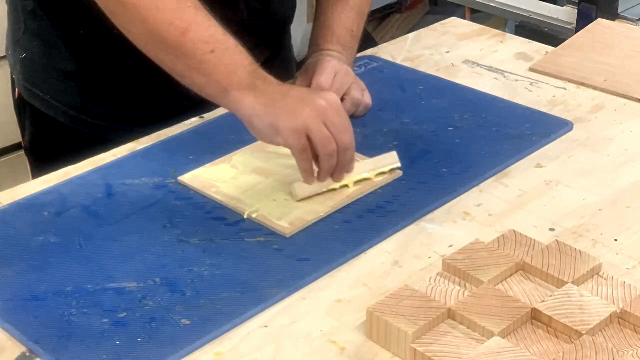
Then, if you like the burned look, which is the entire reason I went through the process of using endgrain and two different height blocks, lightly burn everything with a torch.
FOR THE LOVE OF GOD, BUY A MAPP GAS TORCH. It also works with butane. You can buy a butane torch but I promise you’ll regret it if butane isn’t hot enough for something you’re trying to solder. Then you’ll have to go buy a MAPP gas torch anyway and you’ll have two torches. Just spend the extra money up front. Also, sometimes the butane flame isn’t consistent when you tilt the torch. I can guarantee that in the history of humanity, no one has ever regretting buying a MAPP gas torch over butane.
If you need to see the technique I used, just watch the video above. It’s not that difficult. No need to char it, unless that’s the look you’re going for.
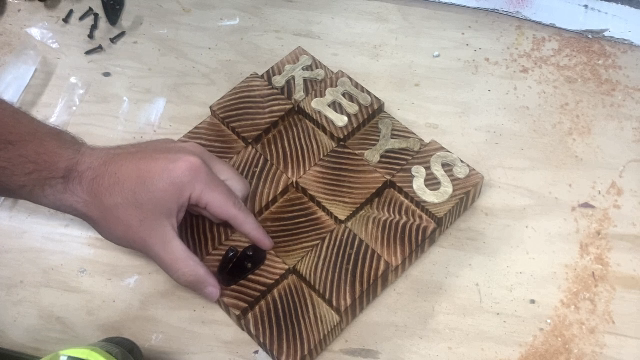
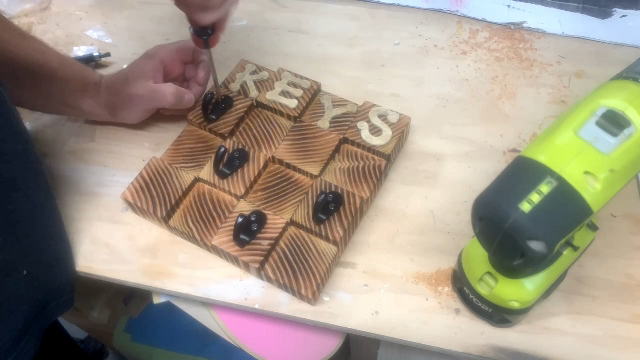
I found some WOOD LETTERS that were about 1.5 inches tall, stained them with Golden Oak and glued them on. You don’t have to write “KEYS”, you can also write “HOME” or any other four letter word. You could even put your last name. If it’s longer than 4 letters, just used the appropriate number of squares. For example, if your last name is Thompson, cut out 32 squares and make it 8x4…or maybe your last name is Schwarzenegger. Then you’d need 56 squares and it would be 14x4. But that’s a lot of squares and I doubt anyone, except for Jay Leno, has that many keys. Maybe you just need more hooks, add 2 more hooks to this one or make the grid larger. That’s the great thing about this, you can customize it to fit your needs.
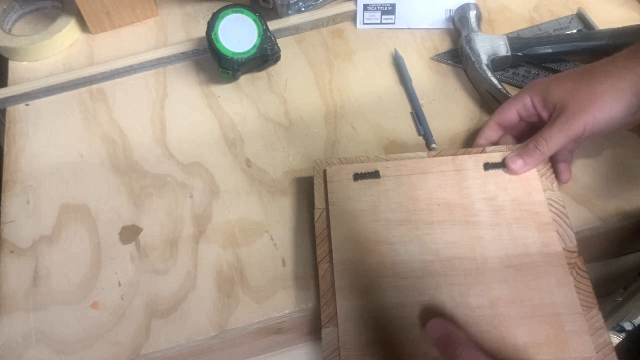
After the letters, I marked the holes for the hooks, I just eyeballed it. Then I drilled pilot holes and screwed in all the hooks.
To attach this thing to the wall, I’m used sawtooth picture hangers. These are low profile and you just hammer them into the back of the key hanger. It says they hold 7 pounds each. I’m using two so it should hold 14 pounds. If you and your spouse are both janitors, or any other profession where you need a key ring with like 50 keys, you’re covered. Then just use two nails or two screws to hang this on the wall. Now enjoy these low quality pictures, while I go dig the keys out of my wife’s purse…or maybe they’re in the diaper bag, who knows where she leaves them…so I can move her car.